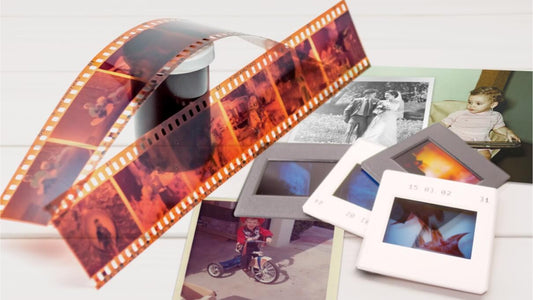
Disposable film cameras are a fantastic way to affordably capture memories of family vacations, special events, birthday parties, and more. The problem is that, unlike pictures on a phone or digital camera, you will still need to get the disposable camera developed.
Capture has been converting your most precious memories to digital since 1999. To ensure you can view, share, and enjoy your disposable camera memories as well, we put together this guide on how to develop a disposable camera.
Read through this guide to learn the basics of disposable camera development and use a step-by-step guide to disposable film processing as well as tips and tricks to ensure you create high-quality photo results.
Jump to:
- Basics of Disposable Camera Development
- Step-by-Step Guide for Developing a Disposable Camera
- Tips and Tricks for Successful Disposable Camera Development
- Troubleshooting and Common Issues
Basics of Disposable Camera Development

While there is a similar process for developing any film camera, there are some primary differences in the basics of disposable camera or single-use camera development. That’s because the film is encased in the camera.
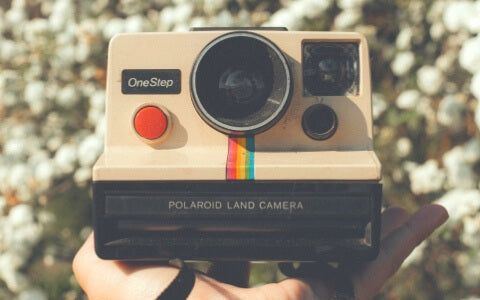
This modern disposable camera film concept was a major milestone in the evolution of the camera and was developed by Fujifilm in 1986. Along with the Polaroid pictures, the disposable camera became an iconic symbol of 80s pop culture. The design has a cardboard and plastic covering containing 27 images of 35mm film (though up to 36 exposures are available in some brands.
Many of them also have a flash for extra point-and-shoot capability even in dim lighting. Simply look through the viewfinder and snap the shot. While this won’t let you take amazing pictures like a professional photographer, it makes it simple to capture memories and the quality is good enough for simple use.
Because they contain 35mm film, you can have disposable cameras developed at most places where you can develop 35mm film, including The Dark Room, CVS, Walgreens, and Walmart. Some, like Walmart, offer in-store drop-off and pick up but send it to a third party for film processing. Other drug stores might do it in-house and accept many types of film canisters from APS to B&W and more.
TheDarkRoom.com is one of the most popular online stores for developing a roll of film. Other online options include Ilford Photo, Richard Photo Lab, and The State Film Lab. With these, you’ll simply mail in your disposable cameras, and they will develop them, mail them back, and include other options like 4x6 prints, black and white film, color film, digital scans, and more.
However, a lot of people would rather develop their own film instead of using a developing service. Sure, a photo lab can create photo prints, great 50th birthday gift ideas, or even make digital scans to put the images on a DVD, they typically develop film the same way for every customer.
By doing it yourself you have complete control over the results you want, which means you can make the perfect pics from your favorite Kodak disposable, Fujifilm QuickSnap single-use camera, or other disposable camera film. Not only that, but you don’t have to wait 5 to 7 business days or longer to receive your developed film.
Plus, it’s kind of fun! Just make sure you don’t try it with priceless photos until you get a hang of the DIY disposable camera development process.
Step-by-Step Guide for Developing a Disposable Camera

If you are a beginner, make sure you follow this step-by-step guide for disposable camera development carefully to ensure your disposable camera photos come out looking great. Even if you’re an experienced film processor, having these steps nearby is a good idea if you aren’t used to developing single-use cameras.
1. Prepare Equipment and Workspace
Here are the supplies and chemicals needed for developing a disposable camera:
- Scissors, screwdriver, and paper clip (to open the camera)
- Canister or sleeve
- Film reel
- Timer
- Developer solution
- Stop solution
- Fixer solution
- Wetting agent
- Hanging wire and clamps
- Developing bag
- Developing tank
Pro Tip: Make sure you read the labels and instructions for the particular chemicals that you plan on using so that you use exact measurements and time requirements. You can get kits on Amazon or at a film photography store like B & H Photo Video.
2.. Remove the Film
Since your film is encased in a disposable camera, the next step is to get it out. Most disposable cameras aren’t designed for easy access, so unless you have a Kodak Funsaver then you’ll probably have to use scissors to open up the cardboard portion. Then, you will have to unclasp the pieces holding the camera together. Some may also have screws that you need to take out first.
Once you pry it open, put the camera inside a developing bag. From this point on, it’s critical that you don’t expose the film to light. Open the camera and clip the film roll from the inside spool and insert the straight edge into your film reel. Wind the film onto the reel. Place the loaded reel into your developing tank and put the lid on.
3. Pre-Wash Film
To pre-wash your film, fill the developing tank with water. Then, soak for about 2 minutes and pour out the water. Try to avoid agitating or stirring the film too much when pouring out the water.
4. Use Developer Solution
Add the proper amount of the developer solution and tap the tank to break up any bubbles. Then agitate for the recommended length of time for your brand of developer solution. Timing is critical for this step, so make sure you time it accurately. You can use a timer on your iPhone or Android to be precise.
Pro Tip: After this step, pour the developer solution into its original container so that you can use it again on another roll of film.
5. Perform Stop Bath
Fill the tank with stop solution. Shake the solution in the developing tank and then empty it out. Repeat this process once more.
6. Pour Fixing Solution
Pour enough fixer solution to cover the film in the developing tank and then agitate once every 10 seconds. Continue doing so for 5 to 10 minutes and then pour the contents back into the storage container.
7. Rinse the Film
Rinse the film with water. Now it can be safely exposed to light. Fill the tank with more water and swish it around vigorously for around 20 seconds. Then, empty it into the sink. Repeat this process for 10 minutes.
8. Use Wetting Agent
Add a half inch of wetting agent to the tank. Then, slowly fill with water until the reel of film is completely underneath the water and wetting agent solution. Tap the tank to eliminate any bubbles and then soak for 30 seconds. Then, empty the tank.
9. Hang to Dry
Take out the reel and unravel the film. Then, han it to dry for at least four hours.
Pro Tip: Make sure you hand it dry in a place where dust and dirt cannot access the film. This will ensure the best quality results without blemishes or imperfections.
10. Cut Film
Once the film is completely dry, cut it into manageable negatives using scissors. Then, store them in a canister or sleeve.
That’s it! You’ve developed your film and now you can scan the film negatives, create photo prints, convert the photos to digital, and much more! But there are also some tips and tricks to help you ensure a successful disposable camera film development process.
Tips and Tricks for Successful Disposable Camera Development

Now that you know how to develop a disposable camera by adapting the traditional film development process for disposable cameras, here are some great tips for successful disposable camera development that can make the process smoother.
First, you can adjust the development time for clear contrast that may look high-resolution. For example, if you develop for a shorter time, there may be less contrast in colors and edges while a longer development time can increase the contrast even more.
Second, developers that use a lot of sodium sulfite are great for creating certain low-resolution effects without too much sharpness. If you want sharper images, then diluted Rodinal will produce more sharp images.
There are also tips for caring for and storing developed disposable camera negatives. Make sure you follow best practices for how to store film. That means you should use acid-free storage options, keep them out of humidity and heat, and try to ensure a light-free container.
Finally, you can play around with drying techniques, half-and-half submersion times, avoiding rinses, and much more to create unique effects like streaks, discoloration, or matte results. Try things out, have fun, and you might be surprised at the cool artistic outcomes.
Developing photos from a disposable camera may take some practice and trial and error to get it just right, so make sure you don’t use your most precious photos until you figure things out.
Troubleshooting and Common Issues

There are some issues that you may encounter when developing film and knowing how to address them can help you ensure success.
If you end up processing disposable camera images that are completely blank, that indicates that you haven’t developed the film at all. This likely shows that you used the wrong chemicals, which is why it’s so important to have the chemicals in the right locations before you enter a darkroom.
If the film is black or foggy, then it might have been exposed to light. This is another reason to follow the best darkroom techniques for developing disposable camera film. This error could have happened when unloading the film from the camera, when loading it into the processing tank, or any step before step 7.
If the images are too dark, then the development time was too long, or the developer was too warm. This can also happen with too much agitation. If the negatives are too light, then there might have been too little exposure in the camera, or you didn’t develop the film for long enough. Too light exposures can also happen with over diluted developer or developer that is too cold.
As mentioned before, figuring out how to develop a disposable camera may take some practice and trial and error. However, once you do it can be a lot of fun and ensure that you create the perfect photo negatives to preserve your memories the way they were intended to be preserved.
Conclusion
The main steps for how to develop a disposable camera are removing the film, rinsing it, then using chemicals to develop it, stopping development, and fixing and wetting it. Then, you can dry it. It can be a lot of fun, but make sure you follow the steps and instructions for timing. Also, keep in mind the temperature for the specific chemicals you choose.
After you develop your disposable camera or any other film, it’s a good idea to create digital copies. That way you can organize your photos, share them with family and friends, and ensure the photos last forever, regardless of what happens to the negatives or original physical copies.
Capture can digitize your photos using professional equipment. Plus, we offer a satisfaction guarantee. Click here to learn about our photo and negative scanning services!


