Polaroid instant cameras brought joy to generations by turning moments into photos you could hold within seconds. Unlike digital photography that allows endless editing, polaroid photography captures life as it truly is, spontaneous, imperfect, and full of character.
A Polaroid picture is an instant photograph created with self-developing film that produces a physical image within minutes. Each one is unique, blending creativity with nostalgia and transforming everyday moments into keepsakes you can hold and share.
This guide explores everything you need to know about instant film photography, including the history of Polaroid cameras, essential equipment, practical polaroid photography tips, and creative techniques that make every photo stand out.
Table of Contents
- The History of Polaroid Pictures
- Polaroid Photography Timeline
- Essential Equipment for Polaroid Photography
- Mastering Techniques for Polaroid Pictures
- Advanced Techniques for Creative Polaroid Photography
- Tips for Getting the Best Results
- Inspiring Examples and Ideas for Polaroid Pictures
- Frequently Asked Questions About Polaroid Pictures
- Preserving the Art and Joy of Polaroid Photography
The History of Polaroid Pictures
The Polaroid Corporation was founded by Edwin H. Land who invented the first instant camera during World War II. Not long after the war, the first Polaroid camera was released in 1948, marking the moment when the very first Polaroid picture was developed. The name Polaroid came from Land’s earlier invention of polarized light filters, which became the foundation of the company’s photographic technology.
With the original model, the photographer had to time the development carefully and pull the photo through a chemical process before peeling away a top film layer to reveal the image underneath.
The first prints were sepia toned, while black and white options arrived in 1950 and quickly became the most popular. Color film appeared in 1963 and brought new life to polaroid pictures.

Polaroid’s story reshaped photography with instant memories.
By the late 1970s, Polaroid had become a household name and dominated the instant film market. The 1980s saw the rise of portable cameras like the Polaroid OneStep, which made instant film photography more accessible than ever before.
Sales began to decline in the 1990s as compact 35mm cameras became cheaper and easier to use. Later, digital photography took over completely by offering instant photos that could be duplicated, shared online, and stored without physical film.
Even with all of this progress, the charm of a polaroid picture never faded. Many people still enjoy the experience of waiting for a photo to develop and watching the image slowly appear. This simple process continues to remind us why tangible photos hold a special kind of magic.
Polaroid Photography Timeline
The history of Polaroid pictures includes decades of innovation, from the first instant photo to the modern revival of instant film. Here are some key milestones that shaped Polaroid photography.
| Year | Milestone |
|---|---|
| 1937 | Polaroid Corporation founded by Edwin H. Land |
| 1948 | First Polaroid instant camera released and first Polaroid picture developed |
| 1950 | Black-and-white Polaroid film introduced |
| 1963 | First color Polaroid film launched |
| 1972 | SX-70 folding SLR camera introduced |
| 1977 | Polaroid OneStep released for mass market |
| 1986 | Polaroid 600 film created for easier indoor shooting |
| 2001 | Polaroid files for bankruptcy amid digital transition |
| 2008 | Instant film production discontinued |
| 2017 | Polaroid Originals revives instant film production |
Essential Equipment for Polaroid Photography
To get started with Polaroid photography, you only need two things, a camera and instant film. However, having the right setup can make a big difference in photo quality and consistency.
Essential items for Polaroid photography:
- Polaroid camera: Choose a model compatible with 600 or SX-70 film. Both are easy to find and perfect for beginners.
- Instant film: 600 film works better indoors, while SX-70 film creates softer outdoor tones.
- Tripod: Helps stabilize your shots in low light and reduces blur.
- Carrying strap or case: Protects your camera while traveling or shooting outdoors.
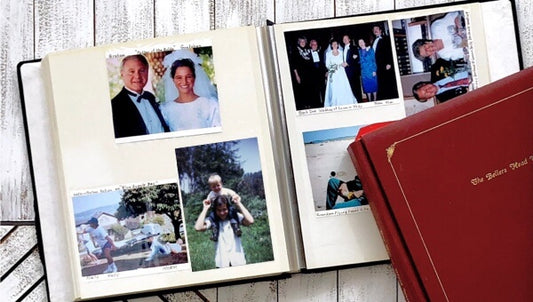
- Photo album or storage sleeve: Keeps your Polaroid pictures safe as they develop.
For photographers on a budget, refurbished Polaroid models are widely available online. Modern alternatives such as the Fujifilm Instax Mini or Instax Wide offer similar instant film results at a lower film cost. For those who prefer digital convenience, pairing a digital camera with a portable printer can recreate the look of instant photos while allowing for easy edits and backups.
Because many people wonder why Polaroid film is more expensive than other types, it helps to know that each print contains several chemical layers that instantly create color. This process makes every photo unique and contributes to its higher price.

Polaroid pictures turn real moments into timeless keepsakes.
Mastering Techniques for Polaroid Pictures
Learning how to take great Polaroid pictures is part of what makes instant photography so enjoyable. While these cameras are simple to use, understanding light, distance, and exposure will help you create beautiful results every time.
Here are some practical Polaroid photography tips for sharper, more balanced photos:
- Pay attention to lighting. The darker the area, the more exposure you will need. If the picture comes out too dark or too bright, simply adjust the exposure and try again. It may take a few attempts to get used to the settings, but once you do, you will see how easy it is to create certain looks with Polaroid pictures.
- Keep your distance. You shouldn’t use Polaroid film photos to take pictures of nearby objects. We recommend standing at least 4 feet from the subject of your photo.
- Use steady hands or a tripod. Staying still during exposure makes a big difference, especially in darker settings.
- Frame with intention. Use the Polaroid frame as a guide to center your subject or create artistic off-center compositions.
- Choose the right environment. Bright, natural light will give the best results for instant film photography. When you move indoors, remember that 600 film performs better than SX-70 film.
- Protect developing photos. After taking the photo, keep it covered and away from direct light while it develops. Avoid shaking the picture and be patient as it reveals its full color and contrast.
Once you get comfortable with these basics techniques for shooting Polaroid pictures, experiment with creative effects such as reflections, color contrast, or close-up textures. The beauty of Polaroid photography is that every shot is unique, and even imperfections can become part of its charm.
Advanced Techniques for Creative Polaroid Photography
After you figure out how to take good Polaroid pictures and can get consistent results, it is time to try more advanced techniques.
You can start by experimenting with different moods and settings. Monochrome and black-and-white films can create a nostalgic, mysterious, or timeless atmosphere. If you prefer color, look for high-contrast backgrounds that make your subject stand out.
Try to play with composition instead of always centering your subject. A slightly tilted frame, a reflection in glass, or an object in the foreground can add depth and creativity to your photos.
Here are a few advanced ideas to explore:
- Double exposure. Some instant cameras allow you to combine two images on a single frame. This technique blends a light and dark image to create surreal or artistic effects.
- Long exposure. You can create striking night photos by using the camera in a dark setting and turning the exposure all the way to light. The shutter will stay open for 14 seconds, producing beautiful light trails and glowing cityscapes.
- Creative layering. Try capturing textures such as fabric, leaves, or reflections to create soft overlays within your composition.
- Close-up details. Focus on small subjects like flowers, jewelry, or handwritten notes to capture the charm of analog photography in miniature form.
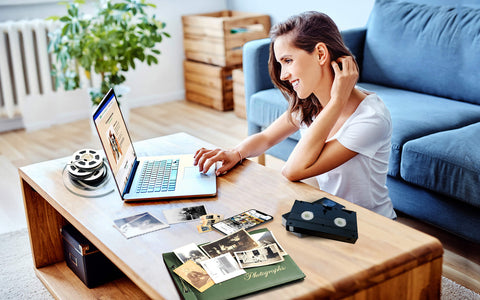
Another fun approach is to digitize your photos once they are developed. This allows you to add animations, organize on your iPhone, combine photos, create slideshows, and more while still retaining the original classic Polaroid style.

Light and distance make every Polaroid shine.
Tips for Getting the Best Results
In addition to using the best practices and experimenting with advanced techniques, there are a few tips you should keep in mind with your camera and film.
- Store your film properly. Take good care of your Polaroid film and store it somewhere cold and dry. This will ensure that the development chemicals last. With proper film storage, Polaroid pictures can last for decades, especially if kept in albums or protective sleeves.
- Stay steady while shooting. Practice staying steady, especially when you are shooting in dark settings. If you have a hard time staying still throughout the exposure period, then you may want to invest in a tripod or strap.
- Be patient while developing. After taking the photo, wait calmly as it develops. It can take ten to fifteen minutes for the full color to appear, so do not worry if the picture looks faded at first. Keep the photo somewhere warm and away from direct light during this process. Although it is common to see people shake their Polaroid pictures, it is better to let them develop naturally.
- Protect your film during travel. You may have wondered, “Can Polaroid go through TSA?” An X-Ray machine can certainly ruin the color of Polaroid film and make the pictures appear pink, cloudy, or even red in severe cases. Politely ask TSA officers to check the film by hand instead of sending it through the machine.
Inspiring Examples and Ideas for Polaroid Pictures
If you need inspiration for your next Polaroid pictures, browse Pinterest or photo-sharing platforms for creative examples. You will find unique ways to display, decorate, and preserve your favorite instant photos.
Here are a few simple Polaroid photo ideas to try:
- Make a scrapbook or journal. Pair your photos with short notes or keepsakes to tell a story.
- Photo walls. Hang prints on string lights or twine for a cozy, nostalgic look.
- Collages. Arrange images by color or theme to turn small prints into wall art.
- Art projects. Use Polaroid photos as a base for painting or mixed media designs.
You can also explore different subjects, lighting conditions, and angles to keep your photography creative. And if you want to give your digital photos the same vintage charm, there are apps that replicate the Polaroid picture style.

Make a scrapbook or wall art with your favorite shots.
Frequently Asked Questions About Polaroid Pictures
How long do Polaroid photos take to develop?
Most Polaroid pictures take about 10 to 15 minutes to develop completely. During that time, it is best to keep the photo face down or shielded from direct light for richer, more accurate colors.
Why does Polaroid have a rainbow logo?
Polaroid introduced the rainbow stripe in the 1970s to represent color innovation and creativity. It symbolized the brand’s shift from black-and-white to full-color instant photography and has since become one of its most recognizable design elements.
What are Polaroid pictures used for?
Polaroid pictures are used for art projects, scrapbooks, travel journals, home décor, and creative photography. Many artists and collectors value them for their tangible, one-of-a-kind quality and nostalgic charm.
Who was the most famous Polaroid photographer?
Ansel Adams is often considered the most famous Polaroid photographer. He collaborated with the Polaroid Corporation for over 30 years, using instant film to test exposure, composition, and the creative possibilities of photography.
What is the biggest Polaroid picture ever made?
The world’s largest Polaroid picture was taken in 2003 with the “Mammoth Camera,” a custom-built 20-by-24-foot instant camera. It produced a giant Polaroid print measuring nearly 40 square feet.
Preserving the Art and Joy of Polaroid Photography
Polaroid photography remains one of the most creative and rewarding ways to capture memories. Each picture tells a story, develops in real time, and reflects the beauty of imperfection. With the right camera, film, and techniques, anyone can enjoy the magic of instant photos that feel personal and timeless.
Even though instant prints may fade over the years, the memories they hold do not have to. By digitizing your Polaroid pictures with Capture, you can protect those moments from damage and share them easily with others while keeping the original charm of film. photography.


