If you want to make a slideshow for Mother’s Day, start with structure. The ideal length is 5–8 minutes. Use 40–80 photos. Follow a clear flow: childhood → milestones → present → heartfelt message. Choose beginner-friendly tools like Canva or iMovie, or advanced editors like Adobe Premiere Pro if you want more control. Pick music early, because pacing depends on it. Keep transitions simple. Focus on emotional clarity, not effects. When done right, a slideshow feels personal, intentional, and unforgettable.
Table of Contents
- Step 1 – Decide the Emotional Theme
- Step 2 – Gather Photos and Videos
- Step 3 – Structure the Slideshow
- Step 4 – Choose the Right Music
- Step 5 – Pick the Best Slideshow App
- Step 6 – Add Meaningful Personal Touches
- Common Mistakes to Avoid
- How Long Should It Be?
- When to Start Preparing
- Final Touches Before You Hit Play
- The Perfect Way to Say Thank You, Mom
Step 1 – Decide the Emotional Theme Before You Start
Before you collect photos, decide what kind of story you want to tell. This makes the entire process easier.
There are three common directions:
- Tribute: A sentimental reflection on her impact
- Celebration: Joyful, upbeat, full of laughter
- Surprise party slideshow: Designed for a live event reaction
Next, choose the tone. Do you want nostalgic? Funny? Deeply sentimental? Or a mix that builds toward emotion at the end?
Also, think about the audience. A private family viewing allows intimate moments. A large event projection needs larger fonts and clearer pacing.

Mini Theme Framework
Ask yourself:
- What feeling should she have at the end?
- Who will be watching?
- Is this intimate or public?
Once that’s clear, everything else becomes simpler.
Step 2 – Gather Photos and Videos That Tell a Story
Strong slideshows tell a story, not just show pictures. Break your collection into sections before you begin arranging slides.
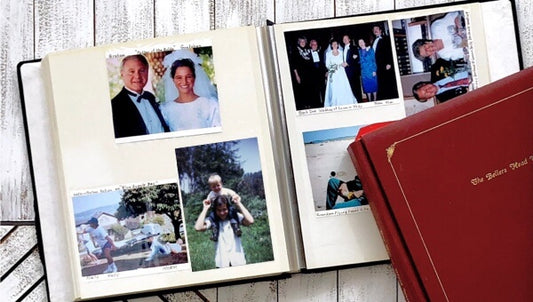
If some of your most meaningful memories live in printed albums or older tapes, convert them to digital first. Clean, high-resolution files make editing easier and prevent last-minute scrambling. A professional photo digitizing service can help ensure consistent quality across older and newer images.
Childhood Memories
Start with images that show her at the beginning of motherhood. Include photos of her holding you as a baby, celebrating early birthdays, walking you to school, or smiling during family vacations. These pictures create an emotional foundation. They remind everyone how much she gave from the very start and set a warm, nostalgic tone for the rest of the slideshow.
Family Milestones
Next, highlight major life moments that shaped your family story. Add graduations, anniversaries, new homes, holiday traditions, and big celebrations. These images show growth over time. They reflect her role in guiding, supporting, and celebrating every important chapter, reinforcing how central she has been through every stage.
Everyday Candid Moments
Include natural, unposed snapshots. Photos of her laughing in the kitchen, relaxing in the garden, or sharing quiet conversations often feel the most powerful. These small, real-life moments show her personality. They capture warmth, humor, and authenticity in ways that formal portraits sometimes cannot.
Recent Photos
Finally, bring the story into the present. Show who she is today. Include recent family gatherings, moments with grandchildren, or simple current-day smiles. Ending with modern photos creates emotional closure and reminds everyone that the story continues, with more memories still to come.
Ideal Balance
To create emotional depth without feeling outdated, aim for a thoughtful mix of past and present memories:
- 60% older memories
- 40% recent photos
This balance builds nostalgia first, then gently brings the story into today.

Step 3 – Structure the Slideshow for Emotional Flow
The way you arrange your photos determines how the story unfolds and how deeply it resonates.
Mother’s Day Slideshow Blueprint
Use this simple timeline structure to guide the emotional flow of your Mother’s Day slideshow from beginning to end. If you want to map everything out before editing, a memory planner can help you organize sections clearly and avoid feeling overwhelmed.
- Opening (30–45 seconds): Start strong. A title slide. A short quote. A smiling photo.
- Memory Build-Up (2–3 minutes): Childhood → early parenting → major life events.
- Emotional Peak (1–2 minutes): Deep moments. Achievements. Big transitions.
- Present-Day Celebration (1–2 minutes): Recent photos. Grandchildren. Modern family gatherings.
- Closing Message (30–60 seconds): Direct message to her. Thank you slide.
If you’ve ever created a wedding slideshow, you already understand emotional pacing. The same structure works here. Slow build. Emotional center. Strong finish. This blueprint prevents overwhelm and helps you avoid simply stacking images.
Step 4 – Choose the Right Music
Audio sets the tone and controls the emotional rhythm of your slideshow. If you plan to include older camcorder footage, convert it to digital first so timing, sound clarity, and transitions stay smooth. You can digitize old home movies before selecting music to avoid syncing issues later.
You can use:
- Sentimental Classics: Timeless ballads with emotional depth.
- Modern Emotional Songs: Contemporary songs that reflect your relationship.
- Instrumental Options: Piano or acoustic tracks keep focus on images.
Some people prefer one strong track. Others use two or three songs to reflect different eras.
Tactical Music Framework
Use this simple framework to align your music with the pacing and emotional flow of your slideshow.
- Match tempo to photo transitions
- Align lyrics with visual moments
- Use fade-in and fade-out for smooth transitions
Search for meaningful Mothers day slideshow music early in the process. Editing becomes easier when rhythm guides you.
If you need inspiration, brainstorm a few Mothers day slideshow ideas that match specific songs before you begin placing photos.
Step 5 – Pick the Best Slideshow App in 2026
Keep it simple. The best tool is the one you understand.
- Best beginner app: Canva – Easy templates and clean design.
- Best mobile app: CapCut – Quick editing on your phone.
- Best professional editor: Adobe Premiere Pro – Full control over pacing and sound.
- Best for event projection: PowerPoint or Keynote – Stable and reliable on large screens.
You do not need complexity to make a slideshow that feels powerful. Clean edits and clear pacing beat fancy effects every time.

Step 6 – Add Meaningful Personal Touches
Templates help, but personalization creates impact. Consider adding:
- A voice-over from children
- A short handwritten note slide
- On-screen quotes from family members
- A “Thank You” section from each child
A short spoken message layered over images often becomes the emotional highlight. Avoid copying generic templates from a birthday slideshow. Mother’s Day should feel specific and intimate.
Common Mistakes to Avoid
Even a heartfelt slideshow can lose impact if small technical or pacing mistakes distract from the emotion.
- Too long (over 10 minutes)
- Too many transitions
- Poor music balance
- Chronological overload
- No clear ending
Over-editing distracts from emotion and pulls attention away from the story you are trying to tell. Too many effects, fast cuts, or dramatic transitions can feel overwhelming. Keep the design clean and let the memories carry the impact.
How Long Should a Mother’s Day Slideshow Be?
The ideal length is 5–8 minutes with 40–80 photos. This keeps attention high while allowing emotional pacing. Anything longer risks fatigue, especially during event screenings.
When to Start Preparing Your Slideshow
Start 2–3 weeks before Mother’s Day. You will need:
- 2–3 days to gather photos
- Extra time if digitizing old prints or tapes
- 3–5 days for editing
- 1–2 days for revisions
If you plan to include old home videos, remember that digitizing can take time. Do not wait until the final week. Start the conversion process early so you have enough time to review and edit the footage properly.
Many people create slideshows for different life events. Unlike a funeral slideshow, this one celebrates presence and appreciation. Focus on warmth, gratitude, and joyful energy. The pacing should feel uplifting and hopeful rather than slow or reflective.

Final Touches Before You Hit Play
Before presentation day, take time to review every detail. Small adjustments can make a big difference in how polished and emotional the final result feels. Watch the slideshow from start to finish without stopping. Notice pacing, volume shifts, or slides that feel too fast or too slow.
If this is part of a larger happy Mother's Day celebration, test everything in the actual space where it will play. Lighting, screen size, and speakers can change how your slideshow feels.
Checklist:
- Test on the TV or projector you will actually use
- Adjust volume levels so music never overpowers voices
- Export in HD (1080p minimum)
- Save a backup copy on a USB and in cloud storage
- Double-check spelling on text slides
- Have tissues ready
Arrive early if it’s an event. Run it once before guests gather. These final checks ensure your slideshow feels intentional, smooth, and ready for an emotional moment.
The Perfect Way to Say Thank You, Mom
When you decide to make a slideshow for Mother’s Day, focus on clarity, structure, and emotion. Keep it 5–8 minutes. Use 40–80 photos. Build from childhood to the present. Choose music intentionally. Add personal messages. Test everything before the big day.
With thoughtful pacing and genuine personalization, you can create something she will replay for years. If some of your most meaningful memories are still stored in albums or on old tapes, preparing them properly makes a real difference. Capture can help you turn printed photos and aging footage into clean digital files so your final slideshow feels polished and complete.
If you plan carefully and allow enough time, you can confidently make a slideshow for Mother’s Day that feels timeless, meaningful, and deeply personal.