Loose 8mm, 16mm, or Super 8 film can easily fall victim to fading, dust, water damage, and heat - putting your actor demo reels, student projects, or cherished family memories at serious risk. Without proper storage, these analog treasures can deteriorate beyond recovery. Since Capture has been preserving precious memories for over 20 years, we put together this guide on how to make a film reel. That way, you’ll be able to roll your film and protect it from rapid deterioration while also having a decorative way to display love for analog cinematography. Read on to see what you will need for your DIY film reel, step-by-step instructions for creating one that’s sturdy, extra tips for storage and decoration, and some common mistakes you’ll want to avoid.
Jump to:
- Necessary Materials and Tools
- Step-by-Step Guide to Film Reel Creation
- Tips for a Successful DIY Film Reel
- Common Mistakes to Avoid
Necessary Materials and Tools

Since film only lasts around 10 to 15 years and can start showing signs even earlier, it’s smart to follow best practices when creating a film reel to store and protect the videography and priceless moments contained in your film.
What Is a Film Reel?
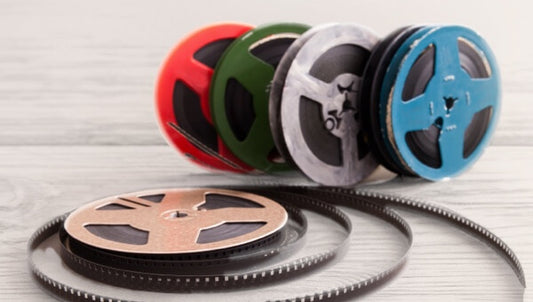
A film reel is a circular spool that holds and winds your film. It keeps the material safe, organized, and sometimes even ready for playback on a motion picture projector. (Note: This is not to be confused with a demo reel compilation demonstrating an actor’s best work to a casting director.)
While this DIY version is perfect for storage or display, it’s not intended for projection. If you’re looking for a fully functional reel for an 8mm or 16mm projector, we recommend purchasing one made for playback.
Materials Checklist
To build your own storage film reel, you’ll need components for the hub, spokes, and center connection. Gather the following supplies:
- Thick, sturdy cardboard
- Cardboard tubes (toilet paper rolls work well)
- Utility knife or craft knife
- Pencil
- String
- Measuring tape or ruler
- Glue (craft glue or hot glue gun)
- Quarter or nickel (for tracing circles)
- Paint (optional, for decoration)
Step-by-Step Guide to Film Reel Creation

Whether you have old home movies on 16mm film to view without a projector, need an attractive and protective way for how to store film, or are a filmmaker who uses analog Super 8 film to mimic old TV shows, this tutorial for assembling a film reel will help!
1. Get Everything Ready
Make sure you get all your supplies together and leave plenty of room on a flat surface to maneuver as you measure and cut. To make it easier, we recommend having your film rolls or strips nearby as well.
2. Create the Outer Discs
The first step for making a movie reel is to cut out the circular discs from the cardboard. You want them to be between 6 inches and 12+ inches depending on how much film you have.
To draw perfect circles:
- Measure and cut a piece of string to half your desired diameter (3–6 inches).
- Anchor one end in the center of your cardboard.
- Attach the other end to a pencil and trace a full circle.
- Cut out the disc and repeat for the second one.
3. Make the Spokes
Inside each disc, draw a smaller inner circle about one-third the size of the outer one.
- Use a ruler to draw six evenly spaced lines (1 inch thick) from the inner to the outer circle.
- Cut away the sections between the lines to leave three wide spokes.
- Use a quarter or nickel to trace small circles along the inner edge of the disc for added detail or realism.
- Carefully cut these out.
Repeat this process for both discs.
4. Attach the Central Reel
Use cardboard tubes (like toilet paper rolls) to create the reel’s core.
- Cut four evenly spaced slits on both ends of the tube.
- Fold the tabs outward.
- Apply strong glue to the flaps and press them firmly onto the center circle of one disc.
- Once secure, glue the second disc on top.
Tip: Avoid getting glue on the film itself. This reel is meant for storage and display, not playback.
5. Decorate (Optional)
If you’re using this film reel as a decoration for a film school, your home, or as a showreel project, then you can spray paint it or use other paint to add on details. Even if you’re using it for storage, it will look better if you paint it.
We also recommend writing your contact information on it so that if it gets lost, someone knows where to send the film montage, acting reel, or family memories contained on the film.
Tips for a Successful DIY Film Reel

Now that you have your Hollywood style film reel complete, here are some tips that can help you protect your film.
1. Wind Film Tightly and Secure the End
Loosely wound film can expose more surface area to light, which may fade colors or distort the original footage. Carefully wind the film tightly and secure the end using gentle tape. Attach the tape to the reel’s inner core, not directly to the filmstrip.
2. Use Separate Reels for Different Film Strips
To avoid tangling or damage, we strongly recommend storing them on separate reels. However, if you do store them on the same reel, you can use professional splicing tape made for your format 16mm, 8mm or Super 8 film to prevent tears and misalignment.
3. Store in a Cool, Dark, and Dry Place
While this DIY reel is great for basic storage or display, it’s not built to the same protective standard as archival film cases or professional cinematography kits. Because of that, we still recommend storing film reel in a cool, dry, and dark place. That’s because humidity can:
- Cause fading and discoloration
- Promote mold or mildew growth
- Degrade the physical structure of the film
4. Consider Digitizing Your Film
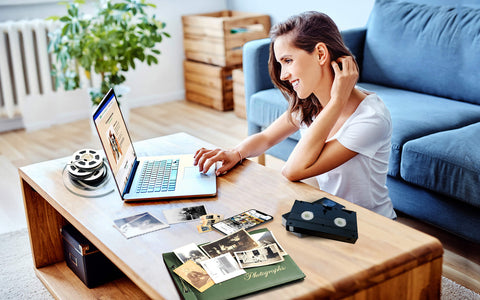
Even with proper storage, analog film won’t last forever. Digitizing your film is the most reliable way to preserve it for future generations. Transfer your 8mm or 16mm film to digital with Capture to keep your footage safe, viewable, and editable - no reel required.
Common Mistakes to Avoid

To get the most out of your DIY film reel, and protect the footage you care about, avoid these frequent mistakes:
1. Using Unsafe Materials
Avoid using materials that could permanently damage your film. That includes:
- Paint or spray coatings applied before the film is loaded
- General-purpose tape instead of proper film splicing tape
Always use materials designed for archival use or keep the film completely separate from decorative elements.
2. Winding the Film Too Loosely
Another common mistake is to wind too loosely. Even during storage, a loosely wound reel is bound to continue to loosen up, which can threaten more of your film, and you may grab it one day and wonder, “Why is my gear exposed and fading?”
Tip: Wind the film snugly and secure the end properly with film-safe tape.
3. Storing Before Digitizing
One of the most common (and costly) mistakes is delaying digitization. Even if you’ve built a perfect reel and stored it carefully, analog film still degrades. We strongly suggest figuring out how to digitize Super 8 film and other film types before any long-term storage or film reel use. Not only does this ensure your precious memories are protected for future generations, but there are tons of other benefits as well.
You can use video editing software to add an intro, make a music video, enhance the quality, upload to Vimeo, add to a podcast, add voiceover, and work on modern sound design. Plus, with a digital copy, you easily store your home movies on any device like a hard drive, iPhone, or cloud storage. You can even share them over social media and email.
Secure Your Film’s Future
Now that you know how to make a film reel, you’re one step closer to preserving your analog film safely and creatively. Film reel crafting is important for both professional and amateur videographers that want their original film copy to last forever, but the truth is that DIY film reel creation doesn’t completely protect your film from deterioration. That’s why we recommend transferring your 16 or 8mm film to digital, your film because you embark on the steps to create a film reel or movie reel construction.
At Capture, we make it easy to digitize your film reels with professional-grade conversion, affordable pricing, and automatic upload to cloud storage and Google Photos.
Ready to preserve your footage for future generations? Digitize your film with Capture!


