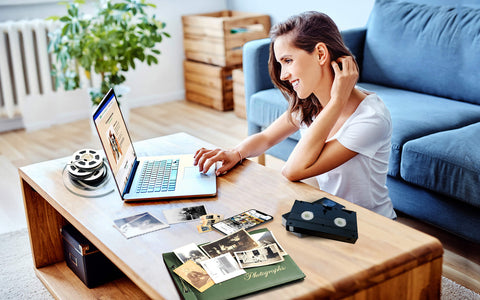
Do you have old videotapes of family memories, home movies, and priceless moments? If so, it’s critical that you convert videotape to digital as soon as possible to ensure those precious memories are preserved forever.
Capture has helped over 12 million families preserve their memories, but some people like to do it themselves. That’s why we put together this video tape to digital guide to help you through the process.
Keep reading to see why it’s important to digitize analog videotapes, what equipment you’ll need, how to convert videotapes with a step-by-step guide, and so much more.
Jump to:
- Understanding the Basics
- Preparing for Conversion
- The Conversion Process
- Post-Conversion: Enhancing and Preserving Digital Files
- Sharing and Enjoying Digital Memories
- Legal and Ethical Considerations
- Conclusion
Understanding the Basics

Your video cassette tapes like VHS, VHS-C, S-VHS, Sony Betamax, MiniDV, Video8, Digital 8, and any other analog video formats store memory using magnetic tape. Unfortunately, the magnetization deteriorates over time, which can damage your memories or even delete them altogether.
On the other hand, digital copies don’t degrade and can be stored in the cloud, social media, your computer, on your phone, and any other digital device. You can even upload VHS to USB, turn Betamax into DVD, and so much more, ensuring your memories are always safe.
Plus, you can enhance digital video or share it with friends, family, and loved ones online. When you consider that most people don’t have a VHS VCR or other videotape player anymore, that’s an extraordinary advantage of digital formats.
While you can get guaranteed results, fast turnaround, and professional quality with Capture, converting your own videotapes is the most affordable video format conversion. That begins with preparing your videotapes and digital conversion equipment.
Preparing for Conversion
Preparing for analog to digital conversion requires you to prepare the videotapes as well as the necessary VHS conversion gear.
Preparing Videotapes
Before you start to digitize videotapes, you’ll need to assess your home movie collection. This starts with finding out the types of videotapes you have, which will be important to figuring out how to watch old video camera tapes. That’s because you have to be able to play the tapes to convert them to digital.
You should also evaluate the condition of the tapes to determine if they are damaged, moldy, or dirty. If they are, then you might have to perform videotape or VHS tape repair.
If the videotape case is broken, you will have to buy a replacement case online and transfer the film reels to the new case.
For torn or heavily damaged magnetic tape, you’ll have to splice it together using splicing tape. This is easy to do, but you’ll lose any of the footage from the part you take out of the tape.
Finally, you can use cotton cloth or microfiber to clean the tapes. Only use a small amount of isopropyl alcohol to ensure you don’t damage them in the process. That means no water or soap!
Getting the Right Equipment
Now that you’ve prepared your tapes, you’ll need to get the right equipment for video tape transfer or VHS digitization. First, you’ll need a way to read the data and play the analog video formats.
The most common way to do this is with a VCR, Betamax player, Hi8 tape player, or other playback devices specifically for the type of tapes you have as well as format like PAL or NTSC.
If you don’t have a VHS player, you can find a VCR for sale online at places like Amazon, Walmart, or eBay. Alternatively, you can use a vintage camcorder to play the tapes, which works just as well with most digital converters.
If you have VHS-C tapes, then you will also need an adapter to create a standard VHS tape that you can play with a VCR. Additionally, you’ll need RCA or HDMI cables depending on the digital converter. The RCA cables will connect to your playback device while an HDMI, RCA, or USB port will be found on your digital converter.
Finally, you’ll need the videotape or VHS to digital converter itself. There are various types of converters, and some are better than others. Some offer software that you download onto your computer, like the Roxio VHS to DVD or Elgato Video Capture Card.
One thing to keep in mind when shopping for one of these devices is their compatibility not only with your analog media, but also with your computer. While many options work with both Windows and Mac, others do not.
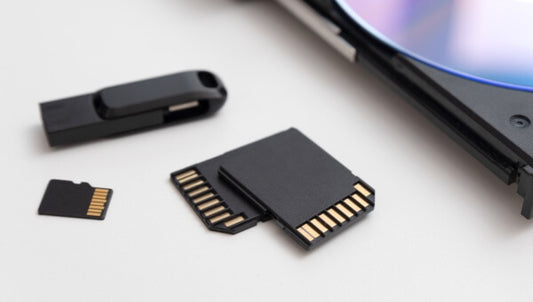
Others are standalone devices that add your family memories to a USB flash drive or SD card. While they are generally more expensive, they can be very convenient. Plus, options like the ClearClick USB Video Capture Device have built-in screens so you can view your memories while transferring home videos.
The Conversion Process

Now it’s time to start the video conversion process. There are only a few steps to follow, but make sure you also follow the instructions for your video transfer device.
1. Set Up Your Space
Make sure you set up an area for conversion. Transferring analog to digital files happens in real time, so you’ll want it to be comfortable. We recommend having an assembly line-type setup with your videotapes on one end and your computer on the other.
2. Connect All Devices
Now, you’ll want to connect all your devices. This could just be your camcorder or VCR connecting to your digital converter but could also involve your computer or even an external hard drive.
3. Install Software
Before you begin, you’ll have to install the software. This will probably take a few minutes but will prepare you for a lifetime of preserved memories.
4. Insert and Play the Videotapes
Now you can insert your videotapes into the playback device. Follow the instructions that come with your digital conversion software and equipment, but generally, once everything is set up, you’ll just have to play the videotapes.
5. Preserve Digital Files
Once the videotape has played completely, you’ll be left with a digital file that you can save to virtually any digital device like a USB drive, SD card, computer, or phone. We recommend storing it in at least two places to ensure that no matter what happens, your memories will be safe.
Post-Conversion: Enhancing and Preserving Digital Files

After you convert VHS or other videotapes, you can enhance them with metadata, editing, and more.
You can use tools like Adobe Video Editing Software or iMovie to edit your videos. You can trim segments, adjust audio, change brightness, enhance color, boost contrast, or even add effects like sepia tone or black and white to your old VHS tapes.
Additionally, you can add metadata to the files, which makes them easy to find and organize. Speaking of organizing family memories, you should try to use a system with folders for easy storage and sharing.
For example, you could sort the memories by year, person, holiday, or anything else you want. You can even create a virtual scrapbook complete with animations, stylish frames, slideshows, and more!
Sharing and Enjoying Digital Memories
Now that you have transferred video tape to digital, you can share, view, and enjoy your newly digitized memories.
You can preserve old videos by publishing them on social media sites like Facebook or Instagram, sharing your fond memories with the world. Or you can send video files and digital downloads in seconds via email to loved ones across the globe.
If you still prefer physical media after you transfer a video cassette to digital, you can add your memories to a USB thumb drive or DVD copy. This is one of the best birthday or Christmas gifts for parents!
Finally, VHS tape digital conversion allows you to view your memories on a Smart TV or projector, so you can enjoy them and reminisce with family at the next reunion or holiday celebration.
Legal and Ethical Considerations

While this process is fantastic for turning home movies into high-quality digital media, it’s important to remember that commercial VHS tapes that contain Hollywood classics, blockbuster flicks, Disney movies, and other films are often protected by copyright. That means it would be illegal to convert them to digital or share them with the public.
Also, while it might not be illegal, it is a good idea to ask your loved ones’ permission before publishing videos with them online. Some people don’t want their faces to be on the internet for anyone to see.
Conclusion
Now you know how to transfer video tape to digital yourself, creating long-lasting digital copies of your favorite memories. Remember, you’ll want to do this as soon as possible because VHS tapes are already starting to degrade.
While DIY digital video preservation can be affordable and effective, it’s also time-consuming and can be difficult to perfect the quality. Another option is to use professional video tape conversion services like Capture, LegacyBox, iMemories, and more.
Capture offers transfer services not only for almost any videotape format, but also for Super 8 film reels, photographs, and more. With an industry-leading turnaround time of 30 days or less and a state-of-the-art tracking and security system that monitors your memories every step of the way, you can rest assured that your memories are in good hands.


