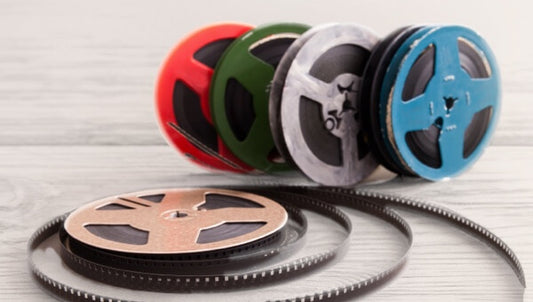
Editing old family videos can be easy and rewarding. With the right steps, anyone can bring favorite memories back to life. Capture helps preserve these special moments by making it easy to digitize your old tapes and recordings. This guide presents simple steps to help you edit home videos clearly, easily, and with confidence, whether you're editing from your computer, at home, or even on your phone.
Jump to:
- Why Edit Home Videos?
- Step 1 – Gather and Organize Your Video Clips
- Step 2 – Choose the Right Video Editing Software
- Step 3 – Import Your Videos into the Editor
- Step 4 – Trim and Arrange Your Clips
- Step 5 – Add Transitions and Effects
- Step 6 – Include Music and Sound Effects
- Step 7 – Insert Text and Titles
- Step 8 – Color Correction and Filters (Optional)
- Step 9 – Export Your Finished Video
- Step 10 – Share Your Edited Home Video
- Common Mistakes to Avoid
- Preserve Memories by Editing Home Videos the Right Way
Why Edit Home Videos?
After you digitize home movies with Capture, learning how to edit home videos helps you take the next step toward preserving your family’s story. Raw footage becomes more enjoyable and meaningful when it’s organized, trimmed, and thoughtfully enhanced.
- Preserve family memories before they fade
- Turn old home videos into polished keepsakes
- Make aging or unwatchable videos enjoyable again
- Share meaningful clips across generations and devices
- Create personalized projects like a wedding slideshow or anniversary reel
Whether you're just starting out or exploring the benefits of editing home videos, the right steps can transform simple footage into something unforgettable.
Preserve Your Memories with Capture
Turn your old tapes into digital copies, USB, DVD, and more—perfect for editing, sharing, and preserving family memories.
Convert Old Home Movies to DigitalStep 1 – Gather and Organize Your Video Clips
Before editing starts, it’s important to organize all your footage.
- Collect clips from phones, camcorders, DVDs, or tapes.
- Once you transfer VHS to digital, add those files into your main folder.
- Group everything into folders by year, event, or people involved.
- Label files clearly to avoid confusion later.
Key takeaway: A few minutes of organizing now saves a lot of editing time later.
Tip: Organizing your footage is the essential first step in learning how to edit home videos effectively.
Step 2 – Choose the Right Video Editing Software
The right editing tool makes a big difference.
- Free options: Clipchamp, iMovie, DaVinci Resolve
- Paid options: Adobe Premiere Elements and others
Tip: Free tools work great for simple edits. Paid programs offer more advanced features. After you convert old home movies to digital, choose the option that best matches your comfort level and editing goals.
Step 3 – Import Your Videos into the Editor
Importing brings your clips into the editing program.
- Use the “Import” button or drag-and-drop features.
- Check that all files transferred correctly.
Helpful hint: Verifying files early prevents missing footage later.
Step 4 – Trim and Arrange Your Clips
Trimming and arranging clips shapes your story.
- Cut out shaky, boring, or confusing parts.
- Start with the strongest clips to grab attention.
- Build a timeline that flows naturally.
Editing tip: Focused videos keep viewers engaged.
Step 5 – Add Transitions and Effects
Transitions help clips flow smoothly.
- Use simple fades, wipes, or slides.
- Avoid flashy effects that distract from the story.
- Use slow motion or light blurs sparingly to enhance emotions.
Key takeaway: Clean transitions create a professional feel.
Step 6 – Include Music and Sound Effects
Music and sounds enhance the emotion of your video.
- Choose slow music for weddings or family memories.
- Pick upbeat songs for parties and celebrations.
- Add sound effects like claps, cheers, or laughter at key moments.
Set the mood: Keep original voices clear and avoid overwhelming the story with background audio.
Step 7 – Insert Text and Titles
Text and titles guide your viewers through your video.
- Introduce scenes, dates, or names with simple text.
- Use easy-to-read fonts and clear colors.
- Add captions when original audio is unclear.
Helpful tip: Simple, clear titles make home videos easier to follow and more professional.
Step 8 – Color Correction and Filters (Optional)
Color edits can refresh old footage.
- Adjust brightness, contrast, and color balance.
- Use filters sparingly to enhance mood without changing the natural look too much.
Reminder: Always preview your edits carefully to keep the natural feel of the footage.
Step 9 – Export Your Finished Video
Exporting saves your final masterpiece.
- Save your video in MP4 format for easy sharing.
- Choose 1080p resolution for the best balance of quality and file size.
- Preview the finished video before sharing it with others.
Final step: A careful final review helps you spot any small mistakes before sending it out.
Step 10 – Share Your Edited Home Video
Sharing keeps your memories alive for generations to come.
- Upload your video to YouTube, Facebook, or cloud storage.
- Create DVDs or memory drives for family events and reunions.
Show off your masterpiece: Sharing edited home videos brings family and friends together to relive those special moments.
Reminder: Knowing how to edit home videos helps you create unforgettable gifts for family, friends, and future generations.
Common Mistakes to Avoid
Avoid these pitfalls for a smoother editing experience:
| Mistake | Why It Matters |
|---|---|
| Using too many flashy transitions | Distracts from the real story |
| Letting music overpower original voices | Loses the authentic feel of memories |
| Skipping the organizing step | Creates confusion and wastes time |
| Not saving project backups during editing | Risk of losing important edits and progress |
Preserve Memories by Editing Home Videos the Right Way
Learning how to edit home videos is simple when you follow clear, easy steps. Organizing footage, trimming clips, adding thoughtful touches, and exporting carefully help create videos that families can treasure for generations to come.
We believe that editing home videos should always feel rewarding, not overwhelming. Preserving family memories is one of the most meaningful gifts you can create—and it's easier than you think.
With Capture’s help and a few simple editing steps, anyone can transform old footage into treasured keepsakes. Start today and keep your family's most important moments alive for generations.