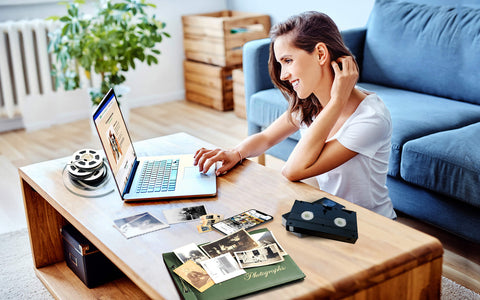
Digitizing your old Video 8 footage is the first step in preserving precious memories, but what comes next? Raw transfers often have imperfections - shaky shots, faded colors, or muffled audio. Fortunately, with the right techniques, you can edit and enhance your old video 8 footage after digitizing, making it more polished, engaging, and enjoyable to watch. Whether you’re creating a family archive, a documentary-style montage, or just refining home videos, a few key enhancements can transform your tapes into something truly special.
Jump to:
Preparing Your Footage for Editing
Before jumping into the editing process, take a few steps to prepare your footage properly. This will save time and make editing smoother.
Organizing and Labeling Files
Once Video 8 to digital conversion is done, you may end up with multiple video files. Keep everything structured:
- Create folders based on dates, events, or themes.
- Rename files so they’re easy to find later (e.g., "Family Trip 1998.mp4").
- Make backups on an external drive or cloud storage to avoid losing your footage.

Choosing the Right Editing Software
Different editing tools offer varying levels of features. If you’re new to video editing, look for user-friendly software that simplifies the process. Here are a few great options:
- Beginner-friendly: iMovie (Mac), Windows Video Editor
- Intermediate: Adobe Premiere Elements, Filmora
- Advanced: DaVinci Resolve, Adobe Premiere Pro
Each of these tools lets you cut, enhance, and export your Video 8 footage with ease.
Basic Editing Techniques
Once your footage is organized, start with simple edits to cut unwanted sections and improve flow. This will help create a smoother viewing experience and make your videos more engaging.
Trimming and splitting clips
Many old videos contain extra footage you don’t need. Trimming lets you remove unwanted parts, while splitting divides clips for better arrangement.
- Trim off static or blank sections at the start and end.
- Split long clips into smaller, manageable sections.
- Rearrange clips to create a logical sequence.
Adjusting Playback Speed
If certain clips feel too slow or fast, adjusting the speed can make them more engaging.
- Slow down fast movements to highlight details.
- Speed up long, uneventful sections.
- Maintain smooth motion to prevent choppy visuals.
Applying Transitions
To make scene changes less abrupt, use transitions between clips.
- Crossfade for a gentle switch.
- Dissolve to create a nostalgic effect.
- Avoid overuse, as too many transitions can be distracting.

Enhancing Audio and Visual Quality
After cutting and arranging your clips, improving quality is the next step. Old Video 8 footage often suffers from grainy visuals and muffled audio. Enhancing these aspects will make your videos clearer, more enjoyable, and easier to watch.
Noise Reduction and Stabilization
Old tapes can look shaky and grainy. Most editing software includes tools to reduce noise and improve stability.
- Use noise reduction filters to clean up grainy visuals.
- Apply stabilization tools to reduce camera shake.
- Adjust sharpness settings carefully to enhance clarity without making the video look artificial.
Color Correction and Exposure Fixes
Colors in old Video 8 footage often look faded or off-balance. Color correction can restore vibrancy.
- Increase contrast and saturation to bring dull footage back to life.
- Fix white balance to remove unnatural color tints.
- Adjust brightness and exposure to correct dark or washed-out scenes.
Improving Audio Clarity
Muffled or noisy audio is common in old recordings. Cleaning up the sound can make dialogue and background noise clearer.
- Reduce background hiss using noise reduction tools.
- Boost volume and balance levels so voices stand out.
- Use equalization (EQ) to remove harsh or muffled tones.
Adding Titles and Effects
To give your video a polished look, consider adding simple text or effects. These small additions can provide context, improve storytelling, and make your footage more visually appealing.
Intro/Outro Titles
Adding titles at the beginning and end makes videos feel more professional.
- Intro titles can include the event name and date.
- Outro titles can wrap up with a short message or credits.
- Use simple fonts that are easy to read.
Simple Text Overlays
If you want to provide context or commentary, text overlays help.
- Label people or places in the footage.
- Highlight important moments with short captions.
- Keep text minimal so it doesn’t distract from the video.
Subtle Effects for Vintage Footage
Video 8 footage has a nostalgic feel, so effects should be subtle.
- Add light grain to preserve the vintage look.
- Use soft fades instead of harsh edits.
- Avoid excessive filters, as they can reduce authenticity.

Exporting and Sharing
After editing, export your video in a format that maintains quality while being easy to share. Choosing the right format ensures compatibility across devices and prevents unnecessary loss of detail.
Recommended File Formats and Resolutions
For the best balance between quality and file size, export using:
- MP4 (H.264) for general use.
- MOV (ProRes) for high-quality preservation.
- 1080p resolution (upscaling from Video 8’s original format).
Cloud Sharing vs. Physical Media
Once your video is ready, choose how to share it with you loved ones:
- Cloud storage (Google Drive, Dropbox) makes it easy to send links.
- YouTube or Vimeo allows for private or public sharing.
- USB drives or DVDs for gifting to family members.
Backup Strategies
To avoid losing your videos, keep multiple backups:
- External hard drives for local storage.
- Cloud services for extra security.
- Multiple copies in different locations.
Edit and Enhance Your Old Video 8 Footage After Digitizing!
Restoring and refining your old Video 8 footage isn’t just about improving quality - it’s about bringing memories back to life. Thoughtful edits, subtle enhancements, and a polished final cut can turn decades-old recordings into something that feels fresh yet nostalgic. Whether you plan to share your videos with loved ones or simply want to relive the past with greater clarity, taking the time to edit and enhance your old Video 8 footage after digitizing it with Capture makes all the difference. With modern editing tools, your treasured moments can continue to be enjoyed for years to come.


