Your family's story deserves more than a dusty box in the attic. Old letters, home videos, and photo albums are pieces of your legacy - but they won't last forever. Today, there’s a better way to protect and share them. You can create a virtual family museum using cloud services, turning fragile keepsakes into a secure, searchable digital collection. With just a few simple steps, your memories can be beautifully preserved and shared with generations to come. This guide will show you how to digitize, organize, and personalize your archive - no tech background required.
What Is a Virtual Family Museum?
A virtual family museum is a private, curated archive of your family’s most precious moments. Think of it like a digital attic, neatly organized, fully searchable, and easily shared. You decide what goes in: scanned letters, video interviews, voice recordings, old slides, or family recipes. It’s more than storage. It’s an experience.
Families today are building these museums for a few good reasons. First, photos fade and tapes degrade. Second, memories scatter across devices. And third, people want to leave something meaningful behind. A virtual family museum fixes all that. It keeps everything in one safe place and makes it easy to revisit, update, or pass on.

Turn your old memories into a living digital archive—organized, searchable, and ready to be shared with the whole family.
Why Cloud Services Are Ideal for Preserving Family History
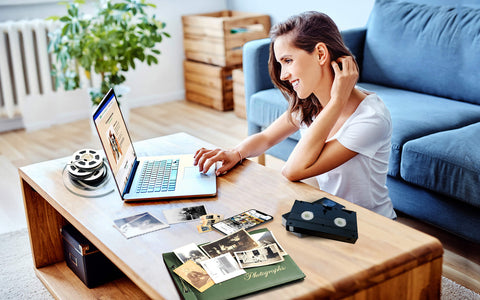
Cloud services make preserving your online family history archive easier, safer, and more flexible. You can access it from your laptop, your phone, or even your TV. No matter where you are, your files are always there. Need to send Grandma a copy of your wedding video? Two clicks, done.
Most cloud platforms like Google Drive, Dropbox, iCloud, and Microsoft OneDrive offer automatic backups. That means you won’t lose your files if your computer crashes. You also get plenty of space. You can start small and upgrade later.
Once your media is digitized - whether scanned at home or through a photo digitizing service - cloud features like search, tags, and metadata help you organize it all. Instead of scrolling endlessly, just type in “Christmas 1994” and instantly pull up the exact moment you're looking for.
🎞️ Ready to Digitize Your Family Memories?
Capture makes it easy to preserve your photos, slides, and home videos—fast, secure, and beautifully organized.
Get Started with DigitizationStep-By-Step Guide to Building Your Virtual Family Museum
Follow these simple steps to transform your family’s memories into a lasting, shareable digital archive.
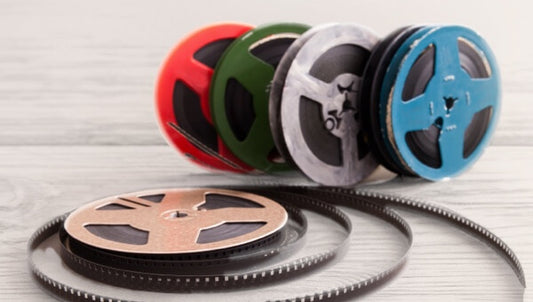
Step 1 – Digitize Old Media (Photos, VHS, Slides)
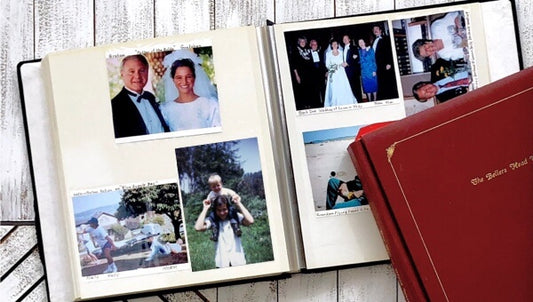
Start by gathering all your physical memories - old photo albums, VHS tapes, film reels, photo slides, or printed letters. These formats degrade over time, so digitizing them is the essential first step.
Sort your items by type (e.g., photos, videos, documents). As you go, label them with names, dates, and places—sticky notes or index cards work well for this. This context will be helpful later when organizing your files.
You can scan items at home or use a professional digitization service to save time and ensure high quality. Once digitized, store the files in a central location on your computer or external drive, and prepare them for upload.
Step 2 – Organize and Curate Your Files
Once you convert VHS tapes to digital, digitize photos and slides, take time to organize your files in a thoughtful and consistent way. Instead of dropping everything into a single folder, use a structure that reflects your family story.
Here are a few ways to stay organized:
- Create folders by decade, event, or family branch (e.g., “Dad’s Side – 1970s,” “Vacations – 1990s”)
- Name each file clearly with details like date, event, and people (e.g., “1987_Thanksgiving_MomDad.jpg”)
- Use a spreadsheet to log filenames, descriptions, and tags
- Color-code or number folders if it helps you keep track of different lines or timelines
- Back everything up - use both cloud storage and a physical drive like a USB or external hard disk
This system will make it easier to search, browse, and expand your archive over time—especially if you plan to share it with other family members.

Start your museum by turning old photos and tapes into digital treasures—organized, preserved, and ready to relive anytime.
Step 3 – Choose a Cloud Platform and Upload
Now that your files are organized, it’s time to move your archive to the cloud. Cloud storage makes your museum accessible, shareable, and protected from data loss.
Popular options include Google Drive, Dropbox, iCloud, and Microsoft OneDrive. Choose one based on:
- Available storage
- File-sharing features
- Ease of use for you and your family members
Set up a master folder (e.g., “Smith Family Archive”) with subfolders that match your organization system. You can create private “rooms” for each branch of the family or major life event.
Some platforms like Dropbox allow folder-level permissions, commenting, and version tracking - helpful if multiple relatives will contribute over time.
Step 4 – Add Context with Stories and Descriptions
Files are more than data - they’re memories. Enrich your virtual museum by adding the stories behind the images.
You can:
- Write captions for each photo or video
- Use Google Docs or Notion to create longer narratives and attach them to folders
- Record voice notes or video messages and upload them alongside your media
- Scan handwritten notes and save them as PDFs
Invite relatives to add their memories too. A short story about a birthday photo or a favorite family recipe adds personal depth and emotional connection.
The more context you add, the more meaningful and valuable your museum becomes.
Step 5 – Share and Keep It Alive
A virtual family museum is meant to evolve - not just sit untouched in the cloud.
Make it interactive and collaborative:
- Invite relatives to contribute their own media and memories
- Create a digital guestbook using Google Forms where family can leave comments or stories
- Set periodic reminders to clean up duplicates, reorganize folders, or upload new content
- Host a virtual “museum tour” over Zoom or Slideshows to showcase updates during holidays or reunions
This keeps your archive active and top-of-mind. Over time, your virtual family museum will grow into a living, shared legacy that brings your family closer—both now and for generations to come.
Extra Touches to Make It Truly Special
Go beyond basic storage by adding features that make the experience more fun. Create virtual tours using Google Slides or Canva. Walk your family through the decades with captions, animations, or even music.
Build a family tree with free tools like Family Echo or Ancestry. Link parts of your archive to people on the tree. You can also use a private blog to host stories, photos, and video updates. That turns your museum into a living project.
These extra touches help people stay engaged. They’ll click, explore, and maybe even contribute something new.

Add life to your museum with virtual tours, family trees, and personal stories. Make it interactive, meaningful, and unforgettable.
FAQ
How do I start building a virtual family museum if I only have a few items?
Start small. Even a handful of digitized photos or letters can be the beginning of a meaningful archive. Focus on organizing what you have, then invite family members to contribute more over time.
Can I create a virtual family museum for free?
Yes, most platforms offer free plans with limited space. You can always upgrade later if needed.
What file formats should I use when saving my digital files?
For long-term storage, use high-quality formats:
- Photos: JPEG or TIFF
- Videos: MP4
- Documents: PDF
These formats are widely supported and easy to organize in the cloud.
What’s the easiest way to get relatives involved?
Start by sharing a link to your cloud folder and explain your project. Offer a simple way for them to contribute, like uploading files to a shared folder or filling out a Google Form with memories or captions.
Is cloud storage safe for long-term preservation?
Yes, most services encrypt your data and provide backups. Still, it’s smart to keep a second copy on a USB or external drive.
How often should I update the virtual museum?
Aim for seasonal updates—every few months or during holidays. Set calendar reminders to add new photos, clean up duplicates, or share highlights with the family.
Ready to Start Your Virtual Family Museum?
Every family has a story worth preserving. With just a few simple steps, you can bring scattered memories together and create something lasting. Start by digitizing your favorite photos, videos, and letters. Then organize them in a secure, shareable archive.
When you create a virtual family museum using cloud services, you’re doing more than storing files - you’re building a legacy. Invite your family to explore, contribute, and stay connected through the stories that shaped you.
Start today, and give your memories the home they deserve.