Last week we shared with you all the ways you can easily share your photos with others with the click of a button! In part two of our three part series, see what Google Lens can do for you!
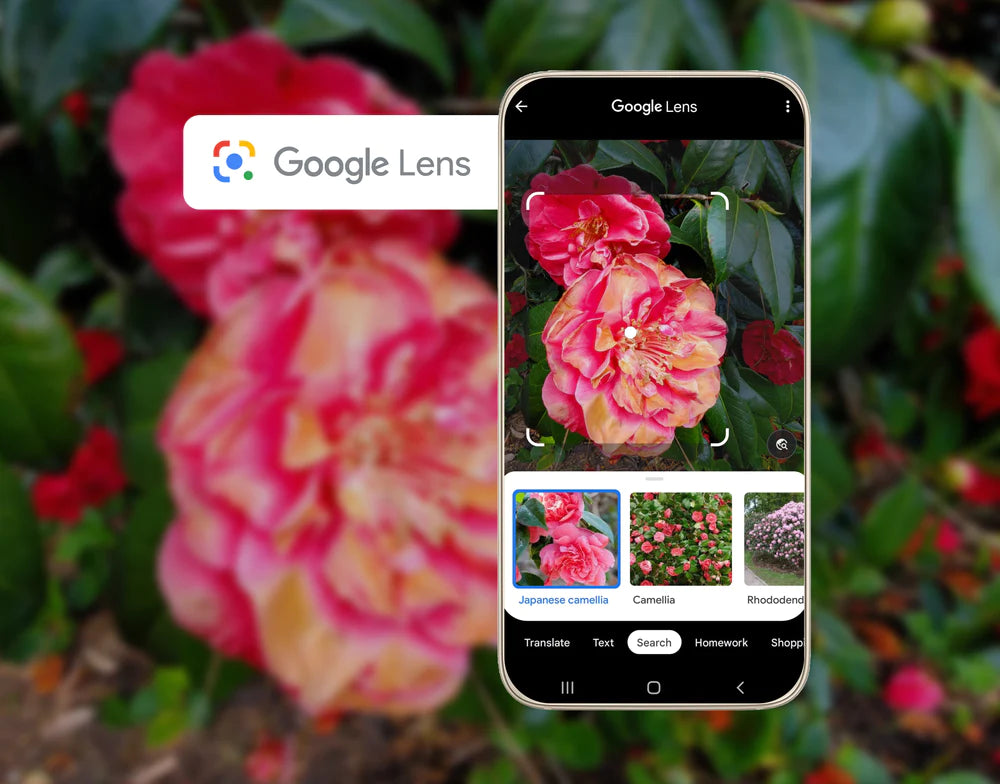
Google Lens is the most useful tool you never knew you needed. Conveniently integrated into Google Photos, Google Lens can quickly identify objects in your pictures and give you information about them. It is easy to use and can help with organization in your Google Photos app. Plus, you may learn a little something!
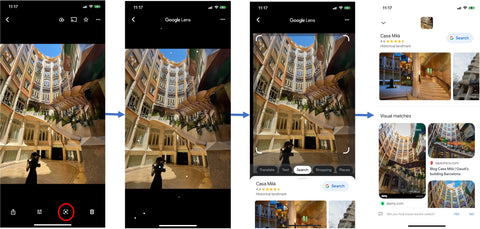
It works as a visual search engine, using artificial intelligence to scan images, display information, and perform tasks. For example, if there’s a building in the photograph, whether it’s a landmark or restaurant, Google Lens will be able to scan it, then recognize and provide details on it. It will show you opening and closing times, the way to get there and even the history behind the building.
But this is only the tip of the iceberg - Google Lens has so many more features. It also translates text, allows you to shop, search for things around you - the list goes on and on.
Here’s a quick description of some of Google Lens’ cool features:
Text Selection: If you have photos of documents or text, you can highlight which area you want Google Lens to scan. It will scan your text, then you have a choice of actions depending on what you scan:
- Copy text: copy then paste the text into your notes or a document
- Copy to computer: send the text to your laptop
- Search: search for whatever is shown in the image
- Listen: Google Lens will read the text out loud to you
- Translate: translate text into your preferred language with the power of Google Translate
- Call: if you’ve scanned a phone number, Google Photos will give you an option to call the number
Shopping: Google Lens can identify an item of clothing in a picture. Once it has scanned the item, it will show you that piece of clothing and similar items. You then have the option to purchase the item.
How to use Google Lens:
- Open up your Google Photos app and tap on ‘Photos’ in the bottom left corner
- Select the photo you want to use Google Lens on and tap on it to open it up
- On the bottom navigation bar, you will see the Google Lens icon (the third icon in the row)
- Tap on the icon and Google Lens will immediately start scanning your image
- Once it is finished, a page will pop up displaying the results of the Google search
Now that you know how to use the Google Lens feature and how to share your photos with friends and family, we have one more feature we want to show you to help you organize your Google Photos Library. Stay tuned next week for the last part of our Discover Google Photos series!
Ready to transfer your old photos so that you can add them to your Google Photos Library? We’ll help you get started here!

