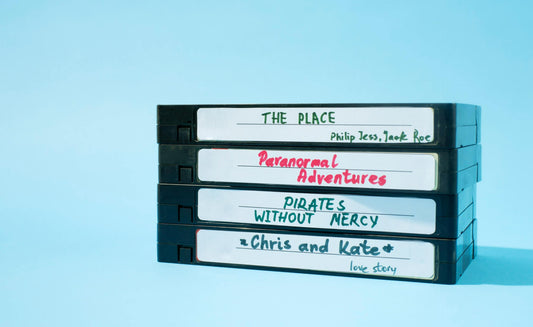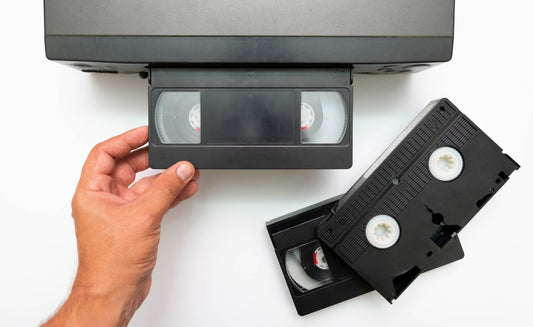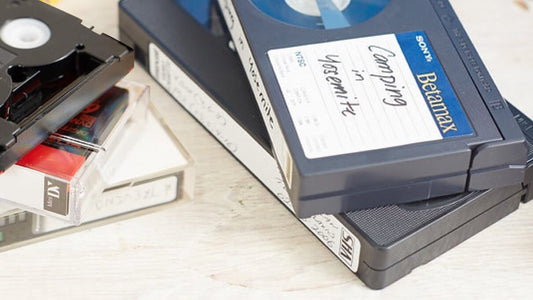
Broken VHS tapes can be stressful, especially if they contain your priceless home movies. With over 12 million satisfied customers, Capture has seen more than our fair share of broken cassettes, ribbon tears, dirty tape heads, and other forms of damage.
Fortunately, many of these issues can be repaired. That’s why we created this comprehensive guide on VHS tape repair so you can save your precious memories. Keep reading to learn about the types of VHS tape damage, steps for repairing videotapes, expert tips, and alternatives to DIY tape repair.
Jump to:
- Quick Steps for Repairing Damaged VHS Tapes
- Alternative Options for Repairing VHS Tapes
- Types of VHS Tape Damage
- What types of damage need experts?
- DIY VHS Tape Repair: Step-by-Step Guide
- Why You May Want to Use Capture Before Trying DIY Repair
- Conclusion
Quick Steps for Repairing Damaged VHS Tapes
Follow these easy steps to learn how to repair VHS tape film and cassettes so that you can view or digitize your home videos, follow these quick steps.
- Examine the tape and identify the type of damage.
- Open the VHS cassette casing using a Philips head screwdriver.
- Carefully cut the tape to remove damaged portions.
- Splice together the film with splicing tape.
- Run tape through pinch rollers and wrap it around the cassette.
- Replace the cassette casing (with new casing if the original is damaged).
- View in your VCR to make sure it works.
These are the basic steps for repairing the tape or replacing the case no matter what type you have including Panasonic and Sony standard VHS tapes, Super VHS (S-VHS), compact VHS (VHS-C), and even other videotape types like MiniDV.
However, there are other types of damage and complex steps to follow to make sure you don’t damage the tape even more. We go into detail later in the article, but first, let’s look at some alternatives and why you might want to avoid DIY repair.
Alternative Options for Repairing VHS Tapes

DIY tape repair is an affordable way to ensure you don’t lose your home movies on the broken VHS tape, but it can also be risky. If you don’t do it correctly, you could lose even more of the footage. In addition, experts will be able to identify other aspects of the tape that need repairs like dirty tape heads, brittle parts, and more.
Here are some alternatives to repairing old VHS tapes yourself:
- Professional Repair Services: There are services that specialize in cleaning and repairing VHS tapes (and other types of videotapes, film, and more). They can be a little expensive but know what they are doing.
- Convert to Digital: Another option is to convert your home movies to digital format. This preserves them forever as digital copies that are easier to save, share, and view. Plus, lots of digitization services, including Capture, also fix VHS tape problems like broke cassette shells and basic ribbon damage.
- Recycle: While you probably want to save your memories, you can also recycle damaged VHS tapes that are beyond repair or don’t contain home movies you need to save.
Types of VHS Tape Damage

There are several ways a VHS tape can break or degrade including broken casing, torn tape, wrinkled tape, broken leaders, demagnetization, and water damage.
Broken Cassette Case
A VHS cassette shell casing can break from physical damage. In addition, over time heat and sunlight can break down the plastic and make it weak and brittle. This makes it prone to damage. Even if there is no visible damage to the case, you may want to replace it if the plastic is old or weak.
Torn Tape
The magnetic tape can tear, snap, or break. When this happens, you will no longer be able to play the video in a VCR unless you splice the ends back together properly. Torn tape can happen all of a sudden during playback or rewinding with little to no warning.
Wrinkled Tape
The tape can also wrinkle and crinkle, which makes the tape unviewable. Creases occur with slackening, broken leaders, and other problems during playback. These wrinkles can be visible while you are viewing your precious memories. While it’s possible to smooth some creases, that’s best left to experts.
Broken Leaders
The leader is the clear part at the end of the videotape that attaches it to the reel. They can break and cause your home videos to be unviewable. You will need to repair and reattach the leader to the reels when this happens. Broken leaders can also contribute to other broken, crinkled, or creased tape.
Demagnetization
Camcorder and VCR heads are designed to pick up magnetic signals and transmit them into images and sound. If exposed to too much magnetic force, the VHS tape could become demagnetized. Slight loss of magnetic charge can cause discoloration and fading, but serious demagnetization will erase the home movies entirely.
Water Damage and Mold
Moisture and humidity can impact your VHS tape and even cause mildew and mold. When this happens, you want to clean them as carefully as possible. When doing so, you have to use distilled water to remove contaminants and then dry out the tape slowly so that it doesn’t warp.
What types of damage need experts?

While we recommend using experts for any VHS tape damage to ensure your home movies are never lost, DIY repair can be used for lots of minor issues. You can probably replace the cassette and perform minor splicing yourself as long as you are careful.
With water damage, mold, demagnetization, and heavily wrinkled or torn tape, you should avoid repairing the tape yourself. This is because these VHS repair issues are severe and require in-depth cleaning, splicing, drying, and other services.
DIY VHS Tape Repair: Step-by-Step Guide

So, you’ve decided to repair your VHS tapes yourself. We’re here to help with step-by-step instructions for splicing, repairing crinkled tape, and cleaning the interior workings of the cassette box. This process will work for all VHS video cassette types including VHS-C tapes, S-VHS tapes, and S-VHS-C tapes as well as Betamax, Mini DV tapes, and other videotapes.
1. Safety Precautions
While fixing VHS tapes is not really dangerous for you as long as you use the scissors, utility knife, and screwdriver properly, it can be dangerous for your precious memories. If you repair the tape incorrectly, you could worsen the issues or cause new damage to the quality of your home movies. That’s why it’s so important to know how to repair a VHS tape before starting.
Use these tips as safety precautions:
- Read through every step before starting the repair.
- Avoid using adhesive tapes like Scotch tape.
- Make sure there are no magnets nearby.
- Never repair tapes that are wet or humid.
- Don’t rush the process.
- While this process works for audio cassettes too, there are some differences so make sure you look up a separate guide.
2. Tools Needed
For videotape repair, you will need:
- Original VHS tape
- Screwdriver
- Scissors
- Splicing tape
- Replacement cassette case
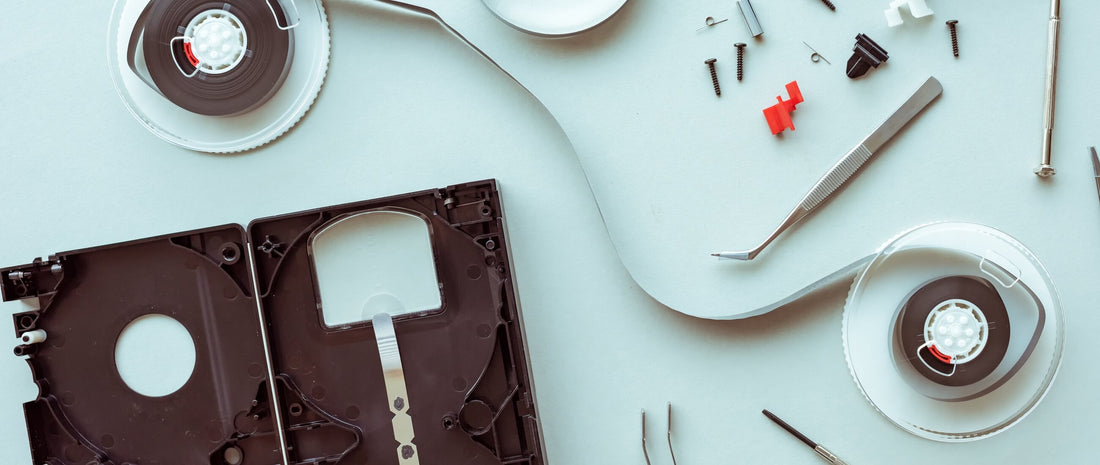
3. Open Cassette Shell
To identify the range of damage to your VHS tape, you will have to open up the cassette. Remove any adhesive labels from the outside of the VHS cassette shell and then use a Phillips head screwdriver to remove the screws. There should be one screw in each corner and a final screw near the center. Lay the cassette flat and gently pull the front half off using a wiggle motion.
Next, you will want to remove the reels. Press and hold the white lever at the bottom center of the VHS tape box to unlock the reels. While holding down the white lever, remove the reels carefully to avoid wrinkling the tape.
4. Identify Damage
Identify the damage based on the types of VHS tape damage outlined above. Look for mold and moisture, damage to the tape itself, wrinkles and creases, and leader damage. You should also check the cassette casing for damage or brittleness.
5. Fixing a Broken Cassette
If the plastic cassette is broken or the screws are worn out, you should replace it with a new one. You can buy new cassette shells online or take one from a VHS tape you have that’s in better condition. Even slight damage to your cassette can make it easier for dust, debris, and moisture to seep through.
Put the reels of tape inside the cassette shell and then screw the other half in. That’s all there is to it!
6. Repairing Broken or Wrinkled Tape
Broken or wrinkled tape film is one of the most common types of damage to VHS tapes and requires you to splice the tape together. Any frayed, wrinkled, or broken sections of tape need to be removed. This will remove some of your home movies but salvage the remainder of the footage.
Use scissors (or a utility knife) to cut off the damaged sections. Make sure you cut the sections out between the reels so that you’re left with two reels with ends. Every 1.5 inches of VHS tape equals approximately 1 second of video in Standard Play (SP) mode, so make sure you only remove the portions that you have to.
While you can use Scotch tape for splicing, it is not suggested. We highly recommend using VHS splicing tape for better results and safety for your home movies. Get a 2-to-3-inch piece of splicing tape and lay it flat on a table or other level surface with the sticky side facing up. The larger the piece, the longer the gap between footage will be when you are viewing your home movies.
Carefully lay one end of the tape to the splicing tape so that the underside of the videotape covers ½ the of the splicing tape. Then, attach the other end of the tape the same way to the other half of the splicing tape. Both ends should meet along the edges, without gaps or overlaps. Finally, wrap the splicing tape around the videotape to secure it.
7. Repairing Broken Leader
A broken leader is very similar to splicing regular tape, but for this you can use Scotch tape without any worries. First, identify the spool where the leader broke from. Then, wrap the adhesive end of the tape around the center of the reel with around 2 inches remaining. Attach the leftover portion to the end of the tape.
8. Replace Reels
After finishing the repairs, you must replace the reels. Wrap the magnetic cassette tape around the outsides of the tape guides (metal parts that hold the reels). One will have a guide roller next to it, which is a small plastic spool that guides the tape. Thread the tape through this part carefully.
Next, you will manually turn the reels and wind all the excess tape back into the neat cassette area. It should be taut, but not overly tight. You should be able to move it with little force, but it should go back to the original position after you let go.
9. Close Cassette and Test
Reassemble the top of the cassette shell and screw all 5 screws into place. Then, put the VHS tape into a VCR player to test it out. If it doesn’t work, then make sure the VCR works with a separate tape. If other tapes work, then you may have to use one of the alternatives to DIY tape repair like professional VHS repair service or digital transfer service. To find a local service, try searching for “VHS tape repair near me.”
Why You May Want to Use Capture Before Trying DIY Repair

Capture offers minor VHS repair services in addition to digitization for your priceless home movies. There are lots of reasons to choose our services before trying to repair the tapes on your own.
Less Risk
With over 20 years of experience, we know what we are doing and will make sure that your VHS tapes aren’t damaged even more. In many cases, improper DIY repair does more harm than good. Our repair services include cleaning and mold removal, basic ribbon damage, and repairing or replacing broken cases.
Digital Format
When you use our service, you preserve your home movies as high-quality digital copies while also getting your VHS tapes back in as good or better condition. This makes it easier to view and share your memories on any device or with social media.
Guarantees and Security
Our digitization services are backed by our 100% satisfaction guarantee to ensure you are happy with the digital results. Plus, our top-of-the-line security system tracks your videotapes every step of the way, through every hand, and right back to your doorstep.
Fast Turnaround
Learning how to repair a broken VHS tape takes time. Then, performing the process on several VHS tapes takes even more time. We can digitize and perform minor VHS repairs, return your tapes, and finalize digital versions in less than 30 days including shipping.
Conclusion

VHS are damaged in many ways from physical damage to moisture, creases, and more. This puts your memories at risk, but it’s often possible to repair VHS tapes without losing too much of your home movies. However, if you don’t do it properly you can risk damaging the videotape even more.
That’s why we recommend going with a professional service. Plus, with many services like Capture, you also preserve your memories as digital copies for future generations to enjoy. Click here if you want to learn more about Capture and the videotape services we offer.